How to Make Kimchi with Napa Cabbage and Anchovy Broth for Beginners: A 2-Week Guide
Disclosure: This post may contain affiliate links. We may earn a commission on qualifying purchases at no extra cost to you.
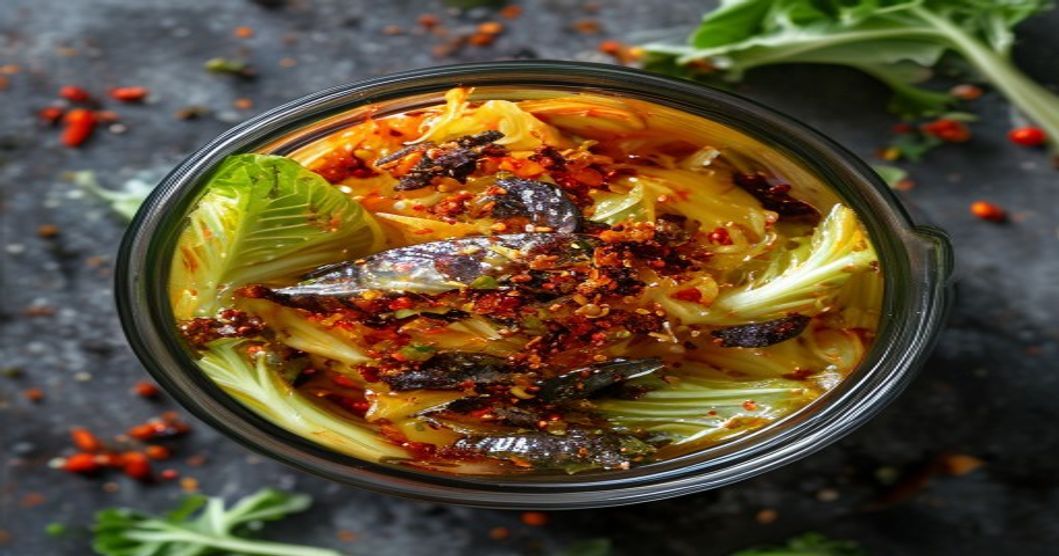
You’ve scrolled past a dozen kimchi posts, watched a few videos, and now you’re standing in your kitchen wondering if you’re actually brave enough to ferment vegetables on your counter for two weeks. That feeling is normal. But here’s the truth: making kimchi at home is not harder than making a good pasta sauce—it just takes patience and the right ingredients. Once you nail the anchor (anchovy broth, garlic, gochugaru), you’ll stop buying it and start making it every month.
Why Anchovy Broth? The Umami Foundation
Most beginners don’t realize that anchovy broth is the secret to kimchi tasting like the good stuff from Korea, not like spicy vegetable soup. The broth does two things: it carries salt evenly into the cabbage leaves, and it adds umami (that savory, mouth-filling depth) that makes your palate want more. Without it, you get tasty spicy cabbage. With it, you get kimchi.
If you’ve never made anchovy broth, it’s embarrassingly simple. Dried Korean anchovies (small ones, not the big white ones) simmered with kombu (kelp) and water for 20 minutes, then strained. That’s it. You can make a batch while you’re prepping the cabbage, and it cools while you do the salting step. If you absolutely cannot find anchovies or want to skip them for flavor reasons, read the FAQ above—there are workarounds. But for your first batch, stick with the real thing.
Sourcing Ingredients: What to Buy and Where
You need five things. Let’s talk about each:
Napa Cabbage
Look for tight, pale-green heads with no brown spots or loose outer leaves. One medium head (about 2–2.5 pounds) makes enough for a one-quart jar, which is perfect for a first batch. Most supermarkets carry napa cabbage year-round now. If your local store doesn’t, Asian markets always have it. Avoid pre-cut bagged napa—you want a whole head.
Gochugaru (Korean Red Chili Flakes)
This is the spice backbone. Don’t grab generic “chili powder”—gochugaru is a specific flake blend with a fruity, slightly sweet undertone. It comes in coarse, medium, and fine grinds. For kimchi, medium or coarse is standard. A one-pound bag from an Asian grocery or online (Amazon carries several Korean brands) runs $5–12 and will last you through many batches. Buy whole bags, not tiny jars. Fresh gochugaru (within the last year) tastes better.
Dried Korean Anchovies (Myeolchi)
These are small, silvery, and sold in cellophane bags in Korean aisles. You want the tiny ones (about 2–3 inches), not the large dried ones used for other dishes. A half-pound bag is cheap and lasts forever in the pantry. If you cannot find them, kombu (dried kelp) broth alone works, though the broth will be less rich.
Garlic and Ginger
Fresh, not jarred. Buy a small bulb of garlic and a thumb-sized piece of ginger. You’ll peel and mince them fresh. This is non-negotiable—jarred garlic and ginger lack the punch and can introduce unwanted microbes.
Sea Salt
Use non-iodized sea salt or kosher salt. Iodized table salt can interfere with fermentation and tastes metallic. A box of sea salt is a few dollars and lasts forever.
Sourcing Tip: If you live near a Korean grocery, go there for gochugaru, anchovies, and kombu. Prices are usually half what Amazon charges, and you can feel the bags to check freshness. If you’re ordering online, check the packed date—gochugaru older than a year loses color and heat.
Step-by-Step: Making Kimchi in 2 Weeks or Less
Week 1: Prep and Fermentation Start (Days 1–3)
Day 1: Prep the Cabbage and Make Anchovy Broth
- Wash the napa cabbage. Soak the whole head in cold water for 5 minutes to loosen dirt between leaves. Cut it in half lengthwise, then cut each half into 2-inch squares. Discard the tough core but keep the pale inner leaves—that’s the good stuff.
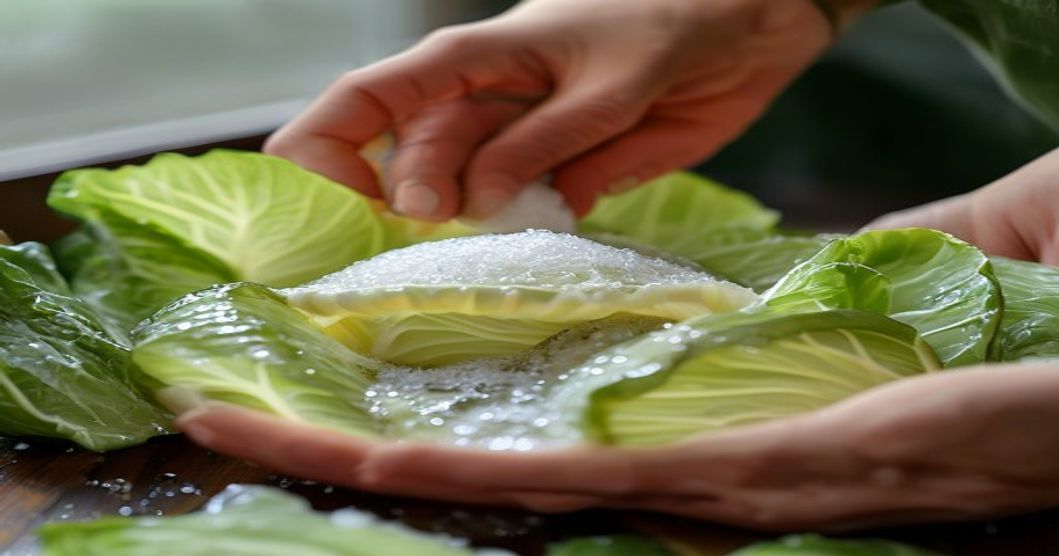
- Salt the cabbage. Put the chopped cabbage in a large bowl. Sprinkle it generously with sea salt—about 2–3 tablespoons per head (roughly 5% of the cabbage’s weight, though beginners can eyeball it). Using your hands, massage the cabbage for 2–3 minutes until it starts to soften and liquid pools at the bottom. The leaves should feel limp and slippery, not crisp. This draws out water and starts the curing process.
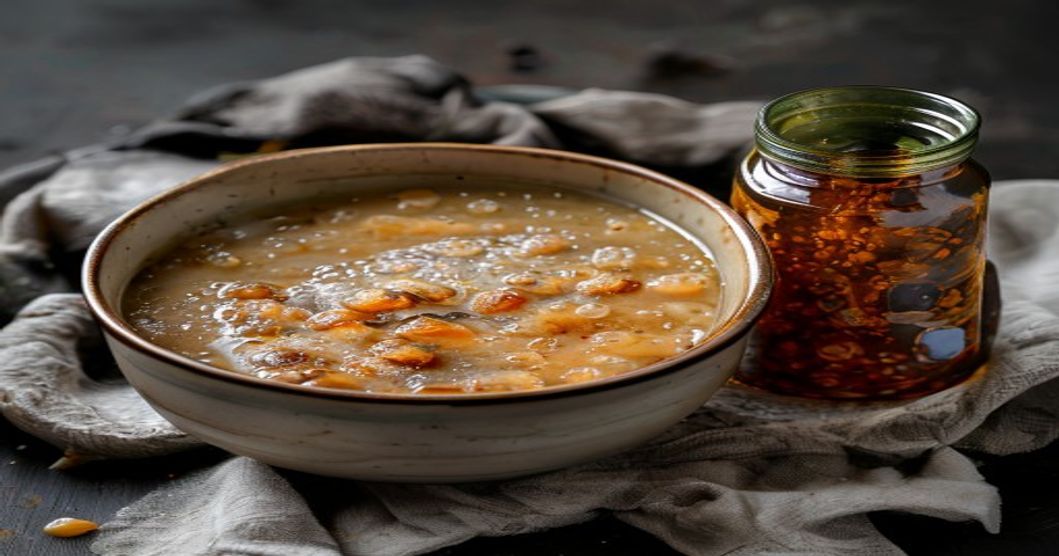
- Make anchovy broth. In a small pot, add a handful of dried anchovies, a 4-inch piece of kombu, and 2 cups of water. Bring to a boil, then lower heat and simmer for 20 minutes. Strain through a fine sieve into a bowl. Let it cool completely. This broth is your liquid gold.
- Drain the salted cabbage. After salting, let it sit for 30 minutes. Then pour the cabbage into a colander and gently squeeze out excess liquid with your hands—not too hard, just until the dripping stops. Rinse the squeezed cabbage under cold water twice to remove excess salt, then drain well again in the colander. Let it sit there while you prep the seasoning paste.
Still Day 1: Make the Seasoning Paste
- Mince garlic and ginger. Peel and finely mince 4–5 cloves of fresh garlic and a thumb-sized piece of ginger (no need to peel ginger if it’s tender). Use a micro-plane or a knife and a cutting board—a food processor turns them into juice.
- Mix the paste. In a medium bowl, combine 2–3 tablespoons of gochugaru, the minced garlic and ginger, 1 tablespoon of sea salt, and 1/2 cup of the cooled anchovy broth. Stir until it forms a thick, wet paste. Taste it (on a tiny piece of cabbage leaf, not your fingers, since raw garlic can repeat on you). If it’s not spicy or salty enough, add more gochugaru or salt. Remember: it will taste very strong right now, but it mellows after fermentation.
Still Day 1: Combine and Jar
- Combine cabbage and paste. Put the drained cabbage back into its original bowl (or a clean large bowl). Pour the seasoning paste over it and, using your hands or two wooden spoons, toss until every piece of cabbage is coated. This takes a few minutes—don’t rush it. You want the paste evenly distributed.
- Pack into a jar. Grab a clean one-quart glass jar (a mason jar is ideal). Using your hands or a wooden spoon, pack the kimchi tightly into the jar, pressing down so the seasoned cabbage releases more liquid and rises above the solids. The brine should cover the cabbage completely; if it doesn’t, pour in a bit more anchovy broth or even plain water with a pinch of salt. Leave about an inch of headspace at the top.
- Cover loosely. Place a cloth (cotton kitchen cloth, cheesecloth, or even a coffee filter) over the jar’s mouth and secure it with a rubber band or a loose ring (don’t screw the lid tight). You want gas to escape during fermentation, but you don’t want dust, fruit flies, or cat fur falling in.
Days 2–3: The Waiting Game
Put the jar on your counter away from direct sunlight—a cabinet corner, pantry shelf, or countertop in a cool room works. Nothing to do now but wait. By day 2, you’ll see small bubbles forming around the edge. By day 3, it’ll smell aggressively garlicky and sour—this is normal. Do not panic. This is fermentation.
If you taste a tiny piece on day 3, it should taste alive: funky, sour, garlicky, and spicy, with the cabbage still having some texture. If it’s too raw or not sour enough, keep fermenting. If it’s already too sour for you, move it to the fridge (this slows fermentation dramatically).
Week 2 and Beyond: Develop and Store
Days 4–7: Tasting and Temperature Watch
By day 5–7, most napa cabbage kimchi reaches a “good” fermentation level—sour, fully funky, and stable. Taste it daily now. You’re looking for a balance between sour and raw, plus that signature umami funk from the anchovy broth. If your kitchen is warm (above 75°F), it may get there faster; if it’s cool, it may take a full week.
Once you like how it tastes, close the jar’s lid loosely (you can use the mason jar’s ring or a loose plastic lid) and move it to the fridge. Cold dramatically slows fermentation, so the flavor will change more slowly. It’ll keep in the fridge for at least 2–3 months, sometimes longer.
Days 8–14 and Beyond: Deep Fermentation (Optional)
If you want to push past the 1-week mark, keep it at cool room temperature (60–68°F) for another week or two. The flavor will intensify, and the texture will soften more. This is the “real” Korean style—aged, complex, and almost unctuous. But beginners often prefer it after a week, so don’t feel obligated to go longer just because.
Troubleshooting: What Can Go Wrong (And How to Avoid It)
White or gray film on top? That’s kahm yeast, a harmless (though ugly) surface yeast. Skim it off with a clean spoon. It’s not mold—mold is fuzzy and green or blue. Kahm yeast is common and means your jar wasn’t completely sealed, which is fine.
Liquid leaked all over my shelf? Gas built up faster than expected. Next time, use a jar with a looser cover, or “burp” the jar (crack the lid to release gas) once a day for the first few days. Some people use a cloth-only cover the whole time and never have this issue.
It tastes mushy and too sour after 3 days? Your kitchen is probably warm, or you used too much salt. Reduce salt slightly next time, and move the jar to a cooler spot. Or accept the faster fermentation and refrigerate earlier.
It still tastes raw and bland after a week? Your room is cold. Warmth (around 68–72°F) speeds fermentation; cold slows it. Try moving the jar to a warmer spot, or just be patient and let it sit for 2 weeks.
The cabbage has a slimy texture and smells like garbage? That one’s actually spoiled. Discard it. Good fermented kimchi smells funky and sour, not rotting. This is rare if you used clean ingredients and a clean jar, but it happens if bacteria contaminate the batch.
Using Your Homemade Kimchi
Once it’s ready, eat it as a banchan (side dish) with rice, or chop it into fried rice, noodle soups (guksu), and cold noodle dishes (naengmyeon). Chop it into a cream cheese and spread it on toast. Add it to omelet fillings. The brine is liquid gold—use it in marinades or stir it into mayo for a spicy sandwich spread.
A jar in the fridge is your emergency flavor bomb. You’ll never buy it again.
The Reading List
Want to level up? Check out these related guides:
- How to Ferment Kimchi Faster at Room Temperature: A Step-by-Step Guide Without Commercial Starter — for those who want to speed things up or don’t have access to traditional ingredients.
- How to Make Kimchi Less Spicy for Kids: Gochugaru Alternatives & Mild Recipes — if your household can’t handle the heat.
- Best Korean Fish Cake Brands for Homemade Broth: Complete Buyer’s Guide — to expand your anchovy and broth sourcing game.
Making napa cabbage kimchi at home is straightforward: salt the cabbage, mix a seasoning paste with gochugaru and anchovy broth, combine them, jar it, and wait 3–7 days (or 2–3 weeks for deeper flavor). You need no special equipment, no commercial starter cultures, and no expensive ingredients. The hardest part is not eating it before it’s fully fermented. Start with one small batch, follow the steps above, and trust the process. By your second jar, you’ll be skipping the store-bought stuff entirely—and charging your friends for jars as gifts.
Disclosure
This article contains affiliate links. If you purchase through links to Amazon or other retailers, I may earn a small commission at no extra cost to you. As an Amazon Associate I earn from qualifying purchases. This helps support the site and allows me to keep writing free guides like this one. Thank you for your support.