How to Make Dakgangjeong (Crispy Korean Chicken) at Home: Step-by-Step Guide
Disclosure: This post may contain affiliate links. We may earn a commission on qualifying purchases at no extra cost to you.
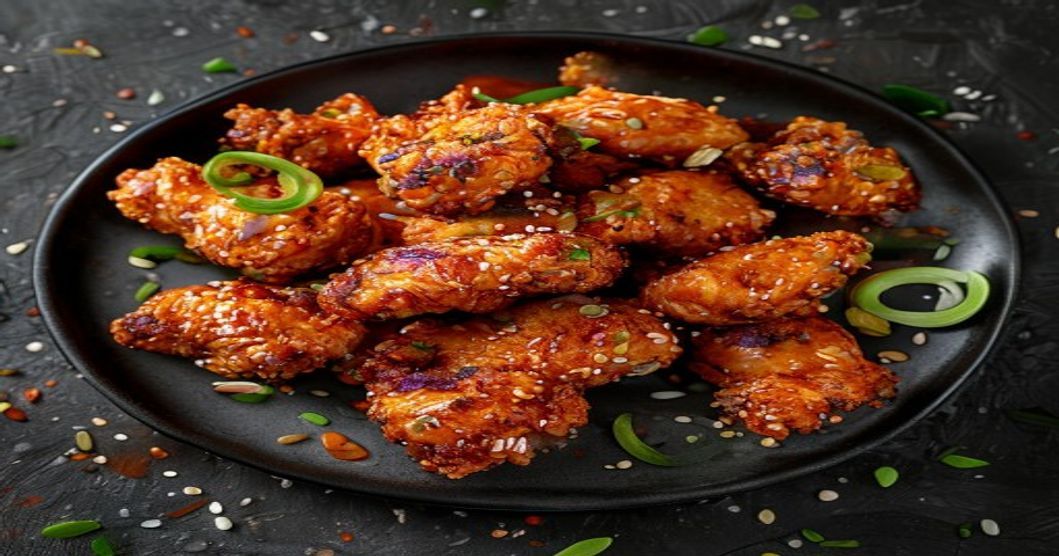
It’s 11 p.m. and you’re scrolling through a Korean food video when it hits: that glossy, crispy, sweet-and-spicy chicken coated in sesame seeds. Dakgangjeong—Korean fried chicken with that iconic candy-like glaze—looks impossible to make at home. Shatteringly crispy outside, tender inside, sauce that clings to every crevice without turning the coating soggy. Here’s the thing: it’s not impossible. You just need to understand three specific techniques. Double-fry the chicken. Keep your oil at the right temperature. Make a sauce that comes together fast and turns glossy.
What Is Dakgangjeong and Why It’s Worth Making at Home
Dakgangjeong literally means “chicken gangjeong,” and gangjeong refers to a Korean candy-coated preparation. It’s become the go-to variation at Korean chicken restaurants, and for good reason. The sauce is what separates this from regular fried chicken—a savory-sweet-spicy glaze made with gochujang (Korean fermented chili paste), soy sauce, sugar, garlic, and a touch of sesame oil. The sauce clings to the chicken in a glossy layer that doesn’t drip off like a wet sauce would. Those bursts of sesame seeds and crispy scallion bits add texture and a subtle nuttiness that completely changes the eating experience.
Making it at home beats delivery. The sauce-to-chicken ratio stays exactly how you want it. The chicken stays crispier longer than delivery chicken, which softens during transport. Plus you control the spice level and can use whatever chicken cut you prefer—thighs, drumsticks, wings, whatever.
The Most Important Technique: Double-Frying
This is the detail that separates good fried chicken from the kind that shatters when you bite it. Most home cooks fry once and end up with either raw insides or burnt outsides. Professional Korean chicken places fry twice. First fry at a lower temperature—around 325-340°F (163-170°C)—cooks the chicken all the way through without browning too fast. Second fry at a higher temperature—350-375°F (175-190°C)—happens for just 1-2 minutes per batch and creates that final crispy, golden shell.
Why does this work? The first fry renders the skin and cooks the meat slowly so it doesn’t dry out. By the time the second fry starts, the chicken is already cooked through, so those final intense seconds create crispness with zero risk of underdone poultry. Skip the second fry and your chicken tastes good but won’t have that signature shatter-crunch.
Ingredients and Equipment You’ll Need
For the Chicken:
- 2-3 lbs (about 900-1350g) chicken thighs or drumsticks, cut into bite-sized pieces (roughly 1.5 to 2 inches)
- 1 cup (120g) all-purpose flour
- 1/2 cup (60g) cornstarch
- 1 teaspoon salt
- 1/2 teaspoon black pepper
- 1/2 teaspoon garlic powder (optional but helpful)
- Oil for deep frying (vegetable, canola, or peanut oil—avoid olive oil, which has a low smoke point)
For the Sauce:
- 3 tablespoons gochujang (Korean fermented chili paste)
- 2 tablespoons soy sauce
- 3 tablespoons sugar
- 2 tablespoons honey or corn syrup (optional, helps the glaze shine)
- 4 cloves garlic, minced very finely
- 1 tablespoon fresh ginger, minced
- 1 tablespoon sesame oil
- 1/2 cup (120ml) water
- 2 teaspoons white vinegar (cuts through richness)
- 1 tablespoon cornstarch mixed with 2 tablespoons water (slurry for thickening)
For Garnish:
- 2-3 tablespoons sesame seeds (toasted or raw)
- 2-3 scallions, sliced thin
Essential Equipment:
- A deep, heavy-bottomed pot or Dutch oven (at least 5-quart capacity)
- Candy/deep-fry thermometer (crucial—don’t skip this)
- Paper towels or a paper bag for draining
- A slotted spoon or spider strainer (lets oil drain while chicken transfers to the pot)
- A small saucepan for making the sauce
If you don’t have a thermometer, buy one. It’s the single best investment you can make for fried chicken. Oil temperature isn’t something you can eyeball accurately. Too cool and your chicken absorbs oil and turns greasy. Too hot and the outside burns before the inside cooks.
Step-by-Step: Making Restaurant-Quality Dakgangjeong
Step 1: Prep Your Chicken (10 minutes)
Pat your chicken pieces completely dry with paper towels. Any moisture on the surface will cause the coating to slide off or steam instead of fry. Wet chicken equals failed crispy coating. If your chicken is straight from the fridge, let it sit at room temperature for about 15 minutes so the temperature change when you fry isn’t so extreme. This helps the inside cook more evenly.
In a large bowl, whisk together the flour, cornstarch, salt, black pepper, and garlic powder. The cornstarch is key—it absorbs moisture and creates an exceptionally crispy exterior. Mix them well so they’re evenly distributed. Dredge each piece of chicken in the flour mixture, coating every surface. Shake off the excess—you want a light, even coat, not clumpy. Place the coated pieces on a plate. If you have time, let them sit for 5-10 minutes. This helps the coating stick better.
Step 2: Heat Your Oil and Do the First Fry (15 minutes)
Pour about 3 inches of oil into your pot (you’ll need roughly 2-3 quarts depending on pot size). Heat it slowly, checking the temperature with your thermometer. Target 325-340°F (163-170°C) for the first fry. This takes about 10-15 minutes depending on how much oil you’re using and your stove’s power—don’t rush it.
Once the oil reaches temperature, carefully place the chicken pieces into the oil one at a time. Work in batches. Crowding the pan drops the oil temperature sharply, and your chicken will absorb oil instead of frying. A good rule of thumb: fry 6-8 pieces at a time, depending on your pot’s size, leaving plenty of space between them. The first fry typically takes around 12-15 minutes, depending on how thick your pieces are. They’re done when they’re pale golden and cooked through—if you cut a piece, there should be no pink inside, and the juices should run clear.
Use a slotted spoon or spider strainer to remove the cooked chicken and transfer it to a paper towel-lined plate. Let it drain and cool for about 5 minutes while you finish the first fry on the remaining batches. Don’t discard the oil—you’ll use it again immediately for the second fry.
Step 3: The Second Fry (5 minutes)
Now increase the oil temperature to 350-375°F (175-190°C). This usually takes 2-3 minutes. Once it reaches temperature, carefully place your partially-fried chicken back into the hot oil in batches, just like before. This time, fry for only 1-2 minutes—you’re not cooking the chicken anymore, just crisping up the exterior. The chicken will turn a deeper, more golden brown, and the surface should look almost crackled.
Remove the chicken and drain it again on fresh paper towels. Now prepare your sauce, because you’ll want it warm and ready to toss with the hot chicken immediately after the second fry finishes.
Step 4: Make the Sauce (5 minutes)
While the chicken is finishing its second fry, heat your sauce ingredients in a small saucepan over medium heat. Add the gochujang, soy sauce, sugar, honey (if using), garlic, ginger, sesame oil, water, and vinegar. Stir constantly until the mixture is smooth and the sugar dissolves completely—about 2-3 minutes. The sauce will look thin right now. That’s normal.
Once the sauce is warm and combined, add your cornstarch slurry (the cornstarch mixed with water). Stir quickly. The sauce will thicken within about 30 seconds. You want it thick enough to coat a spoon but still pourable—not gelatinous. Too thick? Add a little water. Too thin? Let it simmer for another 30 seconds. Keep the sauce on low heat until you’re ready to toss the chicken.
The second fry should finish right as your sauce reaches the perfect thickness. If your sauce is ready first, keep it on low heat (don’t let it boil, or it’ll break). If your chicken is ready first, keep it on paper towels—it can sit for a couple of minutes without getting significantly softer. The key is to toss them while the chicken is still hot and the sauce is still warm. Cold chicken plus hot sauce means the glaze won’t stick.
Step 5: Toss and Garnish (2 minutes)
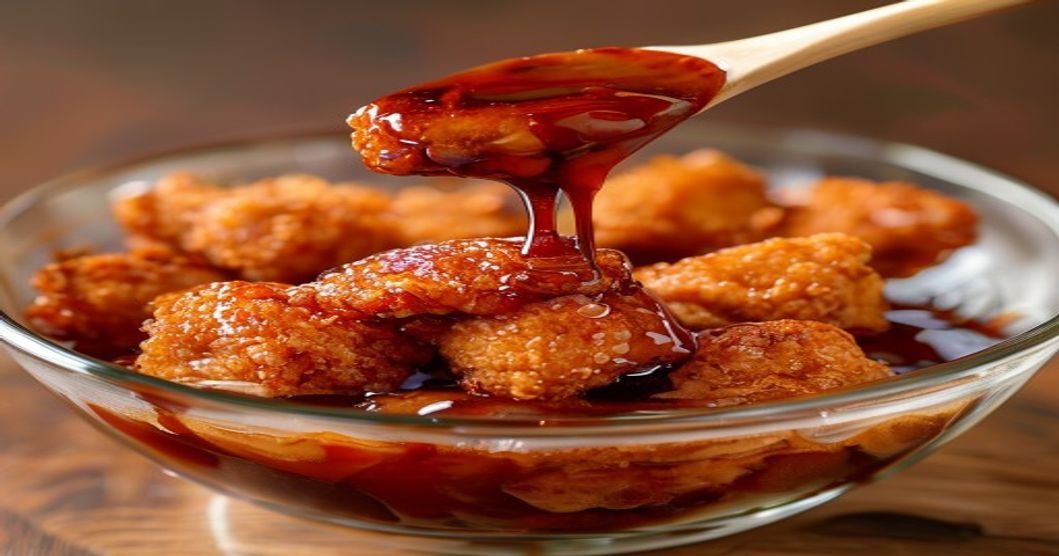
Transfer your drained, crispy chicken to a large bowl. Pour the warm sauce over it immediately and toss quickly and gently with a wooden spoon or tongs, coating every piece. Work fast so the heat from the chicken doesn’t escape. After about 10-15 seconds of tossing, the sauce should cling to every piece in a glossy, sticky layer that looks almost lacquered.
Transfer the chicken to a serving plate or bowl and immediately sprinkle with toasted sesame seeds and sliced scallions. Serve right away. The chicken stays crispest in the first several minutes after cooking. After that, residual steam can soften the outside slightly. Still delicious, just not as dramatic as those first few minutes.
Ingredient Sourcing: Where to Find What You Need
Most of the ingredients are standard pantry items, but a few are Korean-specific and worth sourcing properly.
Gochujang (Korean Fermented Chili Paste): This is the sauce’s backbone. Look for it at any Asian grocery store, or order it online through Amazon or other retailers. A standard jar—typically around 500g—costs somewhere in the range of $4-10 depending on the brand and retailer. It keeps in the fridge for months. Buy a reputable brand like Nongshim, Sunchang, or Maeil. These are widely available and consistent. The paste should be thick, deep red, and slightly grainy from the fermented soybeans.
Sesame Oil: Use toasted sesame oil, not regular sesame oil. The toasted version has a dark amber color and intense nutty flavor. A small bottle goes a long way. Korean brands like Choripdong or CJ are reliable. A 300ml bottle typically costs $5-10 and lasts for many cooking projects. Check current pricing as costs vary by retailer.
Soy Sauce: Regular all-purpose soy sauce works fine. You don’t need anything fancy here. The sauce has lots of other flavors competing, so a basic brand is perfectly adequate.
Fresh Garlic and Ginger: Always use fresh, never the jarred versions. Fresh garlic has a brighter, sharper bite. Fresh ginger adds warmth and slight spice. A bulb of garlic and a small piece of ginger root are inexpensive and widely available.
Sesame Seeds: Buy them in bulk from your local Asian grocery or online. Toast them yourself by heating them in a dry skillet over medium heat for a couple of minutes until fragrant, or buy them pre-toasted. Toasted seeds taste stronger and more impressive than raw.
If you’re building your Korean pantry for the first time, ordering a small bundle through Amazon (gochujang, sesame oil, and sesame seeds together) often makes sense. Shipping a single jar across the country is inefficient. Check current pricing and reviews for specific brands, as prices and availability fluctuate.
Troubleshooting Common Mistakes
Soggy Chicken Instead of Crispy: The most common culprit is oil temperature that’s too low. If your oil is significantly below the target range, the coating will absorb oil and turn greasy instead of crispy. Buy a thermometer if you don’t have one—it’s non-negotiable. Also check that you’re not overcrowding the pan. Each piece should have space around it.
Burnt Outside, Raw Inside: Your oil is too hot on the first fry. Aim for 325-340°F (163-170°C) for the first fry. Also, make sure your chicken pieces are roughly the same size so they cook at the same rate.
Sauce Slides Off the Chicken: The chicken probably isn’t hot enough when you toss it, or the sauce is too cool. Both the chicken and sauce need to be warm for the sauce to stick. Also, make sure you’re draining the chicken very well before tossing—excess oil on the surface prevents the sauce from adhering.
Sauce Is Too Thick (Gluey): You added too much cornstarch or cooked it too long. Next time, use half the cornstarch slurry and stir just until the sauce thickens. If it’s too thick when you’re actually cooking, thin it with a tablespoon of water at a time.
Sauce Tastes One-Dimensional (Too Spicy, Not Sweet Enough, Etc.): This is your chance to adjust. Need more sweetness? Add another tablespoon of honey or sugar. Too spicy? Add a little more soy sauce and reduce the gochujang next time. Not garlicky enough? Minced garlic is inexpensive—add more. The beauty of making it at home is you can dial in the flavor to your exact preference.
Tips for Scaling Up or Making Ahead
This recipe yields roughly 4-6 servings depending on portion size. If you’re cooking for a crowd, the steps don’t change—just cook in larger batches. Prepare all your ingredients beforehand (mise en place) so when the oil reaches temperature, you’re ready to work quickly.
Can you make dakgangjeong ahead? The fried chicken itself doesn’t reheat perfectly. The coating softens. So frying is a same-day task. But you can make the sauce up to a week in advance and store it in the fridge. Gently reheat it on the stove before tossing with freshly-fried chicken. You can also prep your chicken a few hours ahead—cut and dredge it, then store it on a plate in the fridge. Just seal it so the flour coating doesn’t dry out.
How This Recipe Connects to Other Korean Dishes
If you love the sweet-savory-spicy vibe of dakgangjeong, you’ll recognize those same flavor notes in tteokbokki (spicy rice cakes with that same gochujang-based sauce). Both dishes rely on fermented Korean condiments and that signature glaze texture. Similarly, if you’re interested in understanding Korean flavor bases, exploring doenjang (fermented soybean paste) in soups will deepen your understanding of how Korean fermented condiments work across different dishes. And if you’re looking for weeknight shortcuts, trying Korean instant ramen with a homemade broth or toppings is a natural next step once you’re comfortable with Korean cooking fundamentals.
Dakgangjeong is less intimidating than it looks. The double-fry technique takes time but it’s not complicated—just be patient with your oil temperature and don’t crowd the pan. A thermometer and a slotted spoon are your only real tools. Make the sauce while the chicken finishes frying, toss everything while both are hot, and you’ll have shatteringly crispy chicken that rivals restaurants.
Making dakgangjeong at home is entirely doable with a deep pot, a thermometer, and about 30 minutes of attention. The secret is double-frying—first at 325-340°F for cooking, second at 350-375°F for crispness—and tossing the hot chicken with warm sauce immediately after frying finishes. Source your gochujang from a Korean market or online, keep your oil temperature steady, and you’ll produce fried chicken with a crispy exterior and glossy glaze. Serve it hot, sprinkle with sesame seeds and scallions, and enjoy the freshness of chicken prepared at home. Gochujang and sesame oil are pantry staples worth having on hand. They open the door to dozens of other Korean dishes.