How to Make Cucumber Kimchi with Perilla Leaves: A Crispy Summer Side Dish Without Cabbage
Disclosure: This post may contain affiliate links. We may earn a commission on qualifying purchases at no extra cost to you.
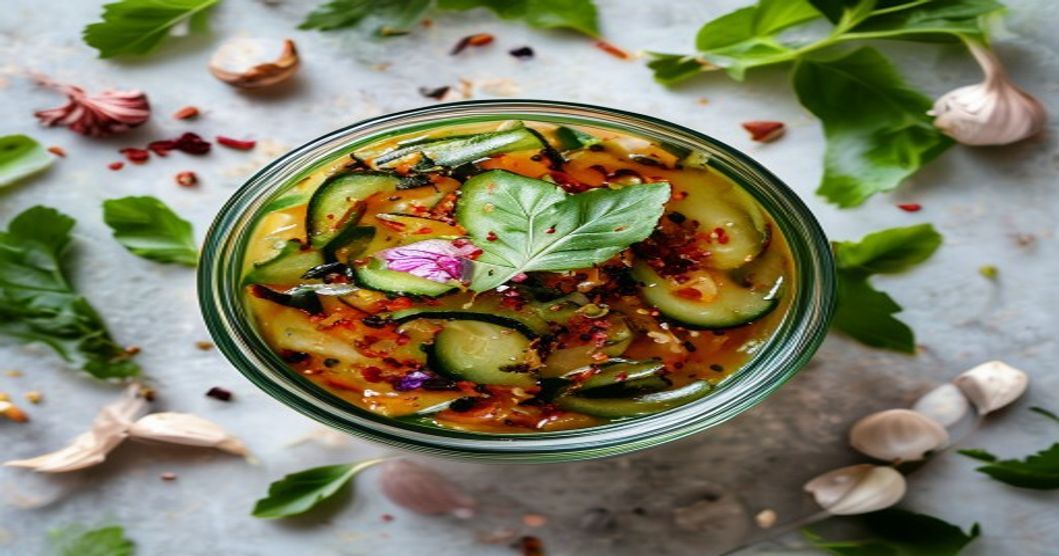
If you’ve never made kimchi before, cucumber with perilla leaves is where to start. It’s faster, fresher, and more forgiving than cabbage. You get that signature tangy, spicy funk in just a couple of days, the cucumbers stay crackling crisp instead of going soft, and the perilla leaves add a whisper of herbal complexity that makes people ask what your secret is. This is a genuine summer side dish—the kind you make in bulk and eat straight from the jar between bites of grilled meat or with cold noodles.
Cucumber kimchi with perilla leaves ferments in 2-3 days and stays crispy. The key is using small, firm cucumbers, layering them with fresh perilla leaves, and a boldly seasoned gochugaru (red chili flake) paste. No special equipment needed—just a clean jar, salt, and patience.
Who This Recipe Is For
This cucumber kimchi belongs in your rotation if you want a banchan (Korean side dish) that doesn’t require days of advance planning. Weeknight cooks love it because fermentation happens fast. People with small kitchens or no fermentation crock appreciate that a mason jar is all you need. And honestly, anyone tired of the same cabbage kimchi every time will find this refreshing—literally refreshing, since the brine stays light and doesn’t develop that intensely funky fermented smell.
If you’re new to fermentation entirely, cucumber is more forgiving than cabbage. Smaller surface area, thinner flesh, and a shorter fermentation window mean fewer things can go wrong. You’ll also taste a noticeable change within 24 hours, which is motivating.
Why Cucumber Over Cabbage?
Napa cabbage kimchi is the classic, but cucumber has real advantages for summer. Cucumbers ferment in 2-3 days instead of 7-14. They stay crispy because the thin walls don’t break down as easily under salt stress. The brine stays lighter and more refreshing—less oppressively funky, more bright and alive. You can also use much smaller jars since you need less volume, and the whole thing takes up minimal fridge space.
Perilla leaves (called kkaennip in Korean) are non-negotiable here. They’re not just garnish—they’re a traditional layer that adds subtle anise and mint notes. If you can’t source them, cilantro or even tender mint leaves work in a pinch, though the result shifts flavor-wise. Check your local Korean grocery or Asian market first; they’re becoming easier to find, especially in spring and summer.
Ingredients You’ll Need
For the cucumbers:
- 2-3 pounds of small firm cucumbers (kirby, Persian, or pickling cucumbers work best—avoid large watery salad cucumbers)
- 3 tablespoons of sea salt or kosher salt (divided: 2 tablespoons for the initial brine, 1 for the paste)
- 1 cup of water
For the seasoning paste:
- 3-4 tablespoons of gochugaru (Korean red chili flakes—the coarser, the better for texture)
- 4-5 cloves of garlic, minced fine
- 1 tablespoon of fresh ginger, minced
- 1 teaspoon of fish sauce or anchovy sauce (jeotgal)
- 1 teaspoon of sugar (optional, but it feeds the beneficial bacteria during fermentation)
- 2-3 green onions (scallions), sliced thin
- 1 tablespoon of sesame seeds (optional, but adds depth)
For layering:
- 20-30 fresh perilla leaves (kkaennip), rinsed and patted dry
Note: All of these ingredients (especially gochugaru, fish sauce, and perilla leaves) are available on Amazon or your local Korean/Asian grocery store. If you’re stocking your pantry for the first time, buy gochugaru in bulk and freeze it—it keeps for months and you’ll use it constantly.
Step-by-Step Instructions
Step 1: Prepare the Cucumbers
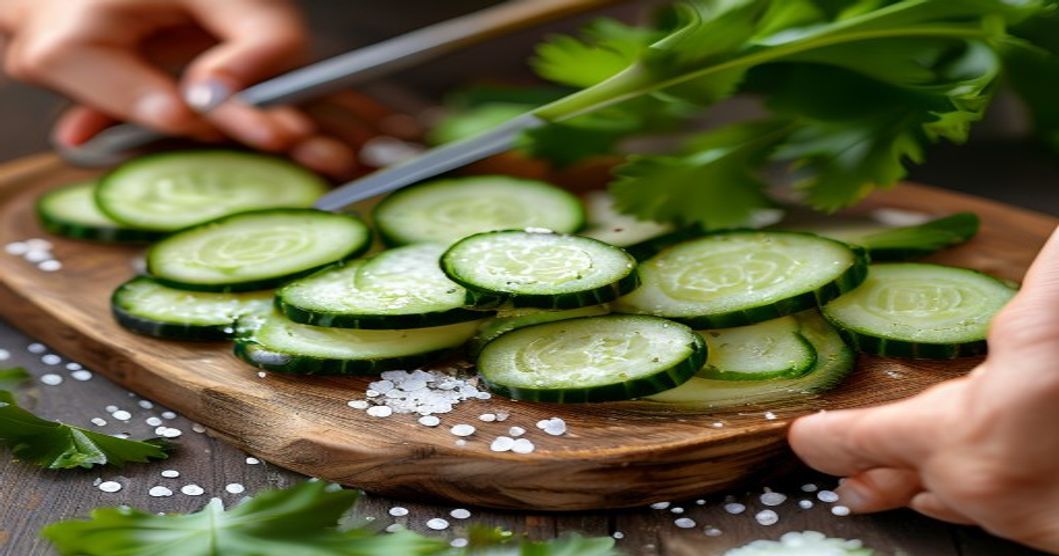
Rinse your cucumbers under cold water and scrub them gently to remove any dirt. Pat them completely dry—excess moisture invites unwanted mold. Cut each cucumber lengthwise into quarters or eighths, depending on size. You want pieces that are roughly 4-5 inches long and about the thickness of your pinky finger. They should fit easily into your jar and not topple over.
Avoid massive watery salad cucumbers; small, firm varieties like Persian or kirby are non-negotiable here. The walls need to be thick enough to stay crisp through fermentation.
Step 2: Brine the Cucumbers (1-2 hours)
In a large bowl, dissolve 2 tablespoons of salt in 1 cup of water. Add the cut cucumbers and stir gently to coat. Let them sit at room temperature for 1-2 hours. This step draws out excess water from the cucumbers—water that would otherwise dilute your seasoning paste and make the final kimchi watery and bland. You’ll see liquid pooling in the bowl.
Don’t skip this. It’s the difference between crispy and soggy.
Step 3: Make the Seasoning Paste
While the cucumbers brine, mince your garlic and ginger very fine. In a small bowl, combine the gochugaru, garlic, ginger, fish sauce, sugar (if using), and remaining 1 tablespoon of salt. Stir until it forms a thick paste. The consistency should be spreadable but not runny—think wet sand rather than soup.
Taste a tiny corner of the paste on your finger (just a grain). It should be noticeably salty, spicy, and savory. If it tastes flat or underseasoned, add a pinch more salt and fish sauce now. You’re building the flavor base that will develop over fermentation.
Step 4: Drain the Cucumbers
After 1-2 hours, carefully drain the cucumbers, reserving the brine. Don’t squeeze them or break them apart—just pour them gently into a colander and let them sit for a few minutes. The brine you’ve extracted is salty and clean; you might add a splash of it back to your paste if it seems too thick, or save it as a finishing touch later.
Step 5: Layer and Pack the Jar
Get your clean jar (mason jar or any glass container with a tight-fitting lid works). Start with a thin layer of the seasoning paste at the bottom—about 1 tablespoon. Then, lay 2-3 perilla leaves flat. Add a layer of cucumber pieces. Spread a little more paste onto the cucumbers. Lay 2-3 more perilla leaves. Repeat until all cucumbers are packed, finishing with a perilla leaf on top and a thin smear of paste.
Pack it snugly but don’t crush the cucumbers. The goal is for everything to stay submerged in its own liquid (which the cucumbers release) and the paste. If after packing the brine doesn’t cover the top, add a splash of cooled, salted water (about 1 teaspoon of salt per cup of water).
Pro tip: The perilla leaves act as a barrier between layers, keeping things organized as they ferment and soften. They also impart flavor as the fermentation progresses. Don’t skip them even if you have to special-order them once.
Step 6: Ferment at Room Temperature (2-3 Days)
Seal the jar loosely if it has a traditional screw lid, or leave it on the counter if it’s a flip-top or airlock jar. Fermentation produces gas, so a tight seal can cause pressure to build. Some people crack the lid open once a day to release pressure; others use a jar with an airlock valve. Don’t overthink it—a finger-tight seal with a brief daily “burp” works fine.
Leave the jar at room temperature (ideally 65-75°F) for 2-3 days. You’ll notice bubbles rising from the bottom after 24 hours. The brine will become cloudy and fizzy. This is good—it means lactobacillus are actively fermenting.
After 24 hours, taste a piece. It should be salty, spicy, and starting to develop a slight tang. If you like it this way, move it to the fridge. If you want more funk and complexity, give it another day or two on the counter. The longer it sits at room temperature, the more sour and alive it becomes.
Step 7: Move to Cold Storage
Once the flavor is where you want it, transfer the jar to the refrigerator. Fermentation slows dramatically at cold temperatures but doesn’t stop entirely, which is perfect. The kimchi will continue to develop subtle flavor notes over the next 1-2 weeks while staying crisp and stable.
Cucumber kimchi keeps in the fridge for 2-3 weeks, sometimes longer if the brine stays cloudy and fizzy. If the brine turns brown or develops a pink film (mold), discard it immediately—that’s a sign something went wrong. A white film is usually harmless yeast, but if you’re concerned, scoop it off and eat the kimchi anyway.
Flavor Development: What to Expect
After 24 hours: Bright, fresh, and only mildly fermented. The spice is sharp, the garlic and ginger are loud. Good if you prefer clean, young kimchi.
After 2-3 days: The goldilocks zone. Tangy without being aggressively sour. The spice has mellowed slightly. Garlic and ginger have integrated into the brine. The cucumbers are still firm and crispy.
After 1 week: Noticeably funky and complex. The flavor has deepened. This is when perilla leaves really shine—their herbal notes shine through. Creamier mouthfeel from the fermented brine.
Stop fermentation at cold storage whenever the taste suits you. There’s no “right” moment—it’s entirely preference.
Storage and Shelf Life
Once in the fridge, cucumber kimchi stays good for 2-3 weeks in most cases, occasionally longer. The key is keeping everything submerged under brine. If a piece pokes above the liquid, mold can develop on the exposed surface. Press cucumbers down if needed, or add a splash of cool, salted water to keep the level high.
Fermented foods are forgiving. A little discoloration on the surface, a slightly cloudy brine, or even a faint white yeast film are all normal and harmless. Use your nose and common sense—if it smells rotten or wrong (not just funky-fermented, but genuinely off), throw it out.
Cucumber kimchi with perilla leaves is a low-pressure introduction to fermentation. It takes 2-3 days, uses minimal ingredients, and tastes bright and alive. If you mess up the first jar, you can make another three times over before spending what you’d drop on a single bottle of store-bought premium kimchi. Once you nail the basics, the seasoning paste formula becomes muscle memory—you’ll be making this every summer.
Troubleshooting Common Issues
Kimchi tastes watery or bland
This usually means either you skipped the initial brining step (which draws out excess water), or your seasoning paste wasn’t assertive enough to begin with. For the next batch, make sure your paste is visibly salty and spicy before jarring. Taste it. If it tastes like it could stand up on its own as a condiment, it’s right. Also, use smaller, firmer cucumbers—larger ones release more water naturally.
Cucumbers are soft instead of crispy
Overcrowding, not enough salt, or letting fermentation go too long at warm room temperature can soften cucumbers. Make sure your pieces aren’t stacked on top of each other (layer with perilla leaves). Use the recommended salt amounts—don’t reduce them. And don’t leave the jar on a sunny windowsill or next to the stove where temperature spikes. Room temperature (65-75°F) is ideal. If fermentation is rapid (it’s a hot summer), move the jar to the fridge after just 24-48 hours.
No bubbles or fermentation visible
This happens if your jar is somewhere very cold or if the beneficial bacteria aren’t active. Lactobacillus fermentation slows dramatically below 60°F. If your kitchen is chilly, move the jar to a warmer spot (a kitchen counter in sunlight, above the fridge, or in a turned-off oven). Also, make sure you’re using real salt—iodized table salt can inhibit fermentation. If you’ve already started with the wrong salt, it’s not ruined, but fermentation will be slower.
White film on the surface
This is usually harmless yeast or kahm (wild yeast that forms in anaerobic ferments). Scrape it off and eat the kimchi below. If you’re concerned, always err on the side of caution and compost it, but it’s almost never dangerous. A pink or black film is actual mold and means the batch is compromised—discard the whole jar.
Ingredient Notes and Sourcing
Gochugaru (Korean Red Chili Flakes)
This is the soul of the kimchi. Korean gochugaru has a unique fruity, warm spice that’s different from cayenne or generic chili flakes. It’s coarser, slightly sweet, and designed for fermentation. Buy it from a Korean grocery store or online—Amazon and specialty food sites carry reputable brands. One large bag (1 pound) costs around $8-12 and lasts for months if frozen. Don’t scrimp on this or substitute with hot pepper powder from the baking aisle.
Perilla Leaves (Kkaennip)
These are increasingly available fresh in Korean and Asian markets, especially in summer. If your local store doesn’t carry them, ask the produce manager—they often special-order. Dried perilla isn’t as good (flavor fades), but it’s better than nothing if fresh is impossible. Some farmers markets also stock them in summer. Once you find a source, get extras and freeze them (they thaw fine for kimchi), or ask if they’ll sell you a whole plant so you can grow your own on a windowsill.
Fish Sauce or Anchovy Sauce
This adds umami depth and feeds fermentation bacteria. You need only a teaspoon, so a bottle lasts a long time. Asian markets have multiple brands; any Southeast Asian or Korean fish sauce works. If you’re vegetarian or vegan, skip it or use a dash of soy sauce or miso paste instead (the depth won’t be identical, but it’ll still be delicious).
Scaling Up and Batch Making
This recipe scales easily. If you’re making kimchi for a crowd or want enough to last weeks, multiply the ingredient ratios proportionally and use a larger jar or even a traditional Korean onggi (earthenware crock). A 2-quart or 1-gallon glass jar handles 5-8 pounds of cucumbers comfortably. The fermentation timeline stays the same—2-3 days at room temperature, then transfer to cold storage.
Many Korean home cooks make a massive batch in early summer and portion it into smaller jars for the season, refreshing with new cucumbers as they deplete. It’s efficient and guarantees fresh kimchi all summer long.
Related Recipes to Explore
Once you’ve mastered cucumber kimchi, you’re ready for other fermented banchan. Try a sweeter variation with radish and apple for a different flavor profile, or scale up to daikon radish kimchi, which ferments in about 10 days and becomes more complex. For the classic cabbage foundation, napa cabbage kimchi with anchovy broth is the gold standard and well worth learning once you’re comfortable with fermentation basics.
Disclosure: This article contains affiliate links. If you purchase through these links, I may earn a small commission at no extra cost to you. As an Amazon Associate I earn from qualifying purchases. I only recommend ingredients and tools I genuinely trust for this recipe—the gochugaru, salt, jars, and other items mentioned are available through verified retailers.